-
 Call Now ! +86 180 2828 6665
 -
 Email Now Fanyl@mhlcd.com
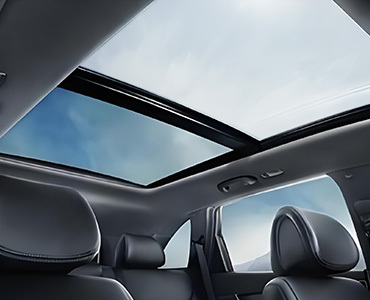 The installation process of car sunroof smart canopy (such as dimming glass, sunshade, etc.) requires professional skills and tools, and is recommended to be operated by a 4S store or a professional tuning store. The following is the general installation process and precautions:
I. Preparation before installation
Confirm compatibility
Check whether the model supports Smart Canopy (original configuration or third-party modification program).
Verify the matching of the canopy size, power interface and vehicle (e.g. voltage, wiring harness layout).
Prepare tools and materials
Smart Canopy components (glass/film, control module, wiring harness, etc.).
Specialized tools: glass suction cups, interior pry bars, screwdrivers, multimeters, insulating tape, etc.
Safety protection: gloves, goggles.
Power failure protection
Disconnect the negative pole of the vehicle battery to avoid the risk of short circuit.
II. Installation Steps (Take Dimming Glass Canopy as an example)
1. Remove the original sunroof/canopy
Use the interior pry bar to carefully remove the roof interior panel to expose the sunroof fixing frame.
Remove the original glass: release the sealing tape and use suction cups to assist in removing the glass (more than one person is required).
Clean up the residual adhesive on the frame and make sure the mounting surface is flat.
2. Installation of Smart Sunroof Assembly
Fixing Dimming Glass
Align the new sunroof glass to the frame and fix it with special adhesive strip or sealant (waterproof should be ensured).
Wiring Connection
Wiring from the roof to the control module (usually located in the headliner or A-pillar).
Connect the power cable (need to connect to ACC or independent switch), grounding wire.
Hide the wiring harness to avoid rattling or interference with the roof reset.
3. Control module debugging
Install the control box (if support APP/voice control, need to pair with the car system).
Test the dimming function (check whether the glass discoloration and light transmittance adjustment are normal after power on).
4. Reinstatement of the interior and testing
Install back the roof trim panel and check that there is no warping or abnormal noise.
Test the sunroof opening and closing (if any) and waterproofness (water test).
III. Precautions
Safety first
High-altitude work need to use brackets to fix the glass to prevent falling.
Circuit modification needs to follow the original car line specification to avoid overloading.
Waterproof sealing
Sealant needs to be evenly applied and cured before testing waterproofing (24 hours of standing time is recommended).
Function Verification
Check the response speed of the sunroof, no flickering/delay.
Ensure that it does not affect the mechanical function of the original sunroof (e.g. openable sunroof).
Warranty and Regulations
Modifications may affect the original vehicle warranty, consult the manufacturer in advance.
Some regions have regulatory requirements on glass transmittance (e.g. ≥70% for front row).
IV. Recommended Solutions
Original Factory Upgrade: Prioritize the smart canopy kit provided by car companies (e.g. Tesla, Azera, etc.).
Third-party brands: choose reputable products (e.g. BOE, Fuyao, etc.) and confirm professional installation services.
For detailed tutorials, it is recommended to provide specific car models and canopy types (e.g. PDLC dimming glass, EC film, etc.), which can further refine the steps.
